
Unlock the Secrets of Bucktail
Getting the Most from Every Inch of Your Bucktail
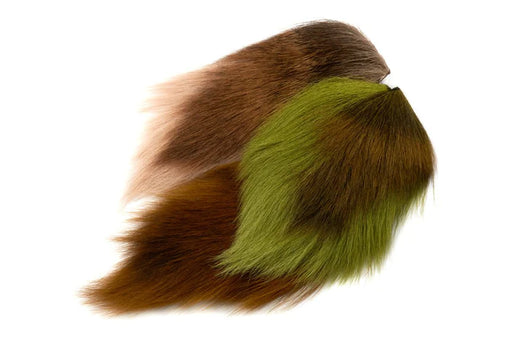
A bucktail isn’t just a bundle of deer hair — it’s a full palette of textures, densities, and actions waiting to be understood. From the soft, flowing fibers near the tip to the coarse, hollow hairs at the base, each section serves a unique purpose at the vise. Knowing how to choose the right portion for your fly can transform the way your patterns look and move in the water. In this post, we’ll break down the anatomy of a bucktail and show you how to get the most out of every inch, whether you’re tying a slim Clouser Minnow or spinning up a buoyant Muddler head.
Understanding the Different Sections of the Bucktail
- Tip / Upper section
- The longest, finest, most flexible hairs at the end of the tail.
- Ideal for: sleek streaming wings, soft tails on small‐to‐medium flies (e.g., smaller streamers, light euro nymph wings) because they flow well in the water.
- Use this section when you want subtle movement and a tapered look.
- Midsection
- Moderately long hairs with some stiffness and decent taper.
- Ideal for: general-purpose streamers and flies where you need moderate volume and shape, reliable shape retention but still some movement.
- Great for wings, under-wings, bodies where you want a blend of look and performance.
- Base / Butt section (near the hide)
- Shorter, thicker, hollow or crinkled hairs, often denser.
- Ideal for: creating bulk, collars, stacked heads, wing-butts, creating lifting or pronounced profiles (e.g., saltwater streamers, larger baitfish imitations).
- When you need “shoulder” or flare or to build volume, this is your go-to section.
- Side hair / edge hair
- Along the edges of the tail; sometimes shorter, slightly coarser, or angled differently.
- Ideal for: accenting—short tails, small wings, blending for texture, creating subtle variation in profiles.
How to Apply This on Your Tying Bench
What to choose when:
- If tying a small freshwater streamer or euro nymph wing: pick hairs from the tip section for softness and fluidity.
- If tying a mid-sized pattern that needs a bit of profile but not full bulk: use the midsection.
- If tying a large baitfish, saltwater fly or you need flare or a chunky head: use the base/butt section.
- If you need accent hairs or texture variation: pull a few from the side hair zone.
Practical tips:
- Sort your tails before tying: separate tip, mid, and base sections and label or bag them for quick access.
- Wash the bucktail (remove oils, loose under-fur) and comb through so that you’re working with clean usable fibers.
- When measuring for wings or tails, always remember that the tip section gives you longest hair; so if you want the fly profile long, use tip. For shorter profile or bulk, go closer to the base.
- Store tails in a breathable bag; flattening or moisture can ruin the hollow structure especially in the base section.
-

Fulling Mill Premium Selected Bucktail
Original price $26.95 - Original price $26.95Original price$26.95$26.95 - $26.95Current price $26.95Premium selected Bucktails. Tails have been treated so that the hair is perfectly straight All tails carefully selected for quality assurance A cla...
View full detailsDESCRIPTION
Premium selected Bucktails. Tails have been treated so that the hair is perfectly straight All tails carefully selected for quality assurance A classic fly tying material with multiple uses including streamers, saltwater and salmon flies 1 x tail per pack
Read More
-


Hareline Large Northern Bucktail
Original price $16.00 - Original price $16.00Original price$16.00$16.00 - $16.00Current price $16.00 -


Hareline Pastel Northern Bucktail
Original price $16.75 - Original price $16.75Original price$16.75$16.75 - $16.75Current price $16.75Hareline Pastel Northern Bucktails Hot colors are great for attracting the attention of fish and triggering the bite. But real baitfish tend to be ...
View full detailsDESCRIPTION
Hareline Pastel Northern Bucktails Hot colors are great for attracting the attention of fish and triggering the bite. But real baitfish tend to be more subtle in their coloration, and pickier fish may respond better to subtly colored flies. This assortment of Pastel Northern Bucktails makes it easy to blend the shades to look like your local baitfish.
Read More
-

Nature's Spirit Select Bucktail Large
Original price $15.00 - Original price $15.00Original price$15.00$15.00 - $15.00Current price $15.00Nature's Spirit Select Northern Bucktails - These Bucktails are graded for size and average 10 to 12 inches long. Hair length ranges from 3 inches...
View full detailsDESCRIPTION
Nature's Spirit Select Northern Bucktails - These Bucktails are graded for size and average 10 to 12 inches long. Hair length ranges from 3 inches up to 6 inches.
Read More


Leave a comment